Analog Patch System
I’ve been working for the past few months on new system installation at the Collegiate School where I teach in NYC. As the systems came together, I started to find opportunities to bridge the lighting, audio, and projection control systems together.
The biggest problem was that there were several devices with several different interface ports in several different locations:
- ETC Net3 I/O Gateway
- Yamaha CL5 Audio Console
- Crestron DMPS300 Control System
- ClearCom MS704 Master Station
The devices use a combination of DB15 and DB25 connectors as well as some bare terminals.
I started researching DB15 and DB25 breakout options to save myself some soldering. I wanted to find something that was easy to move around/change.
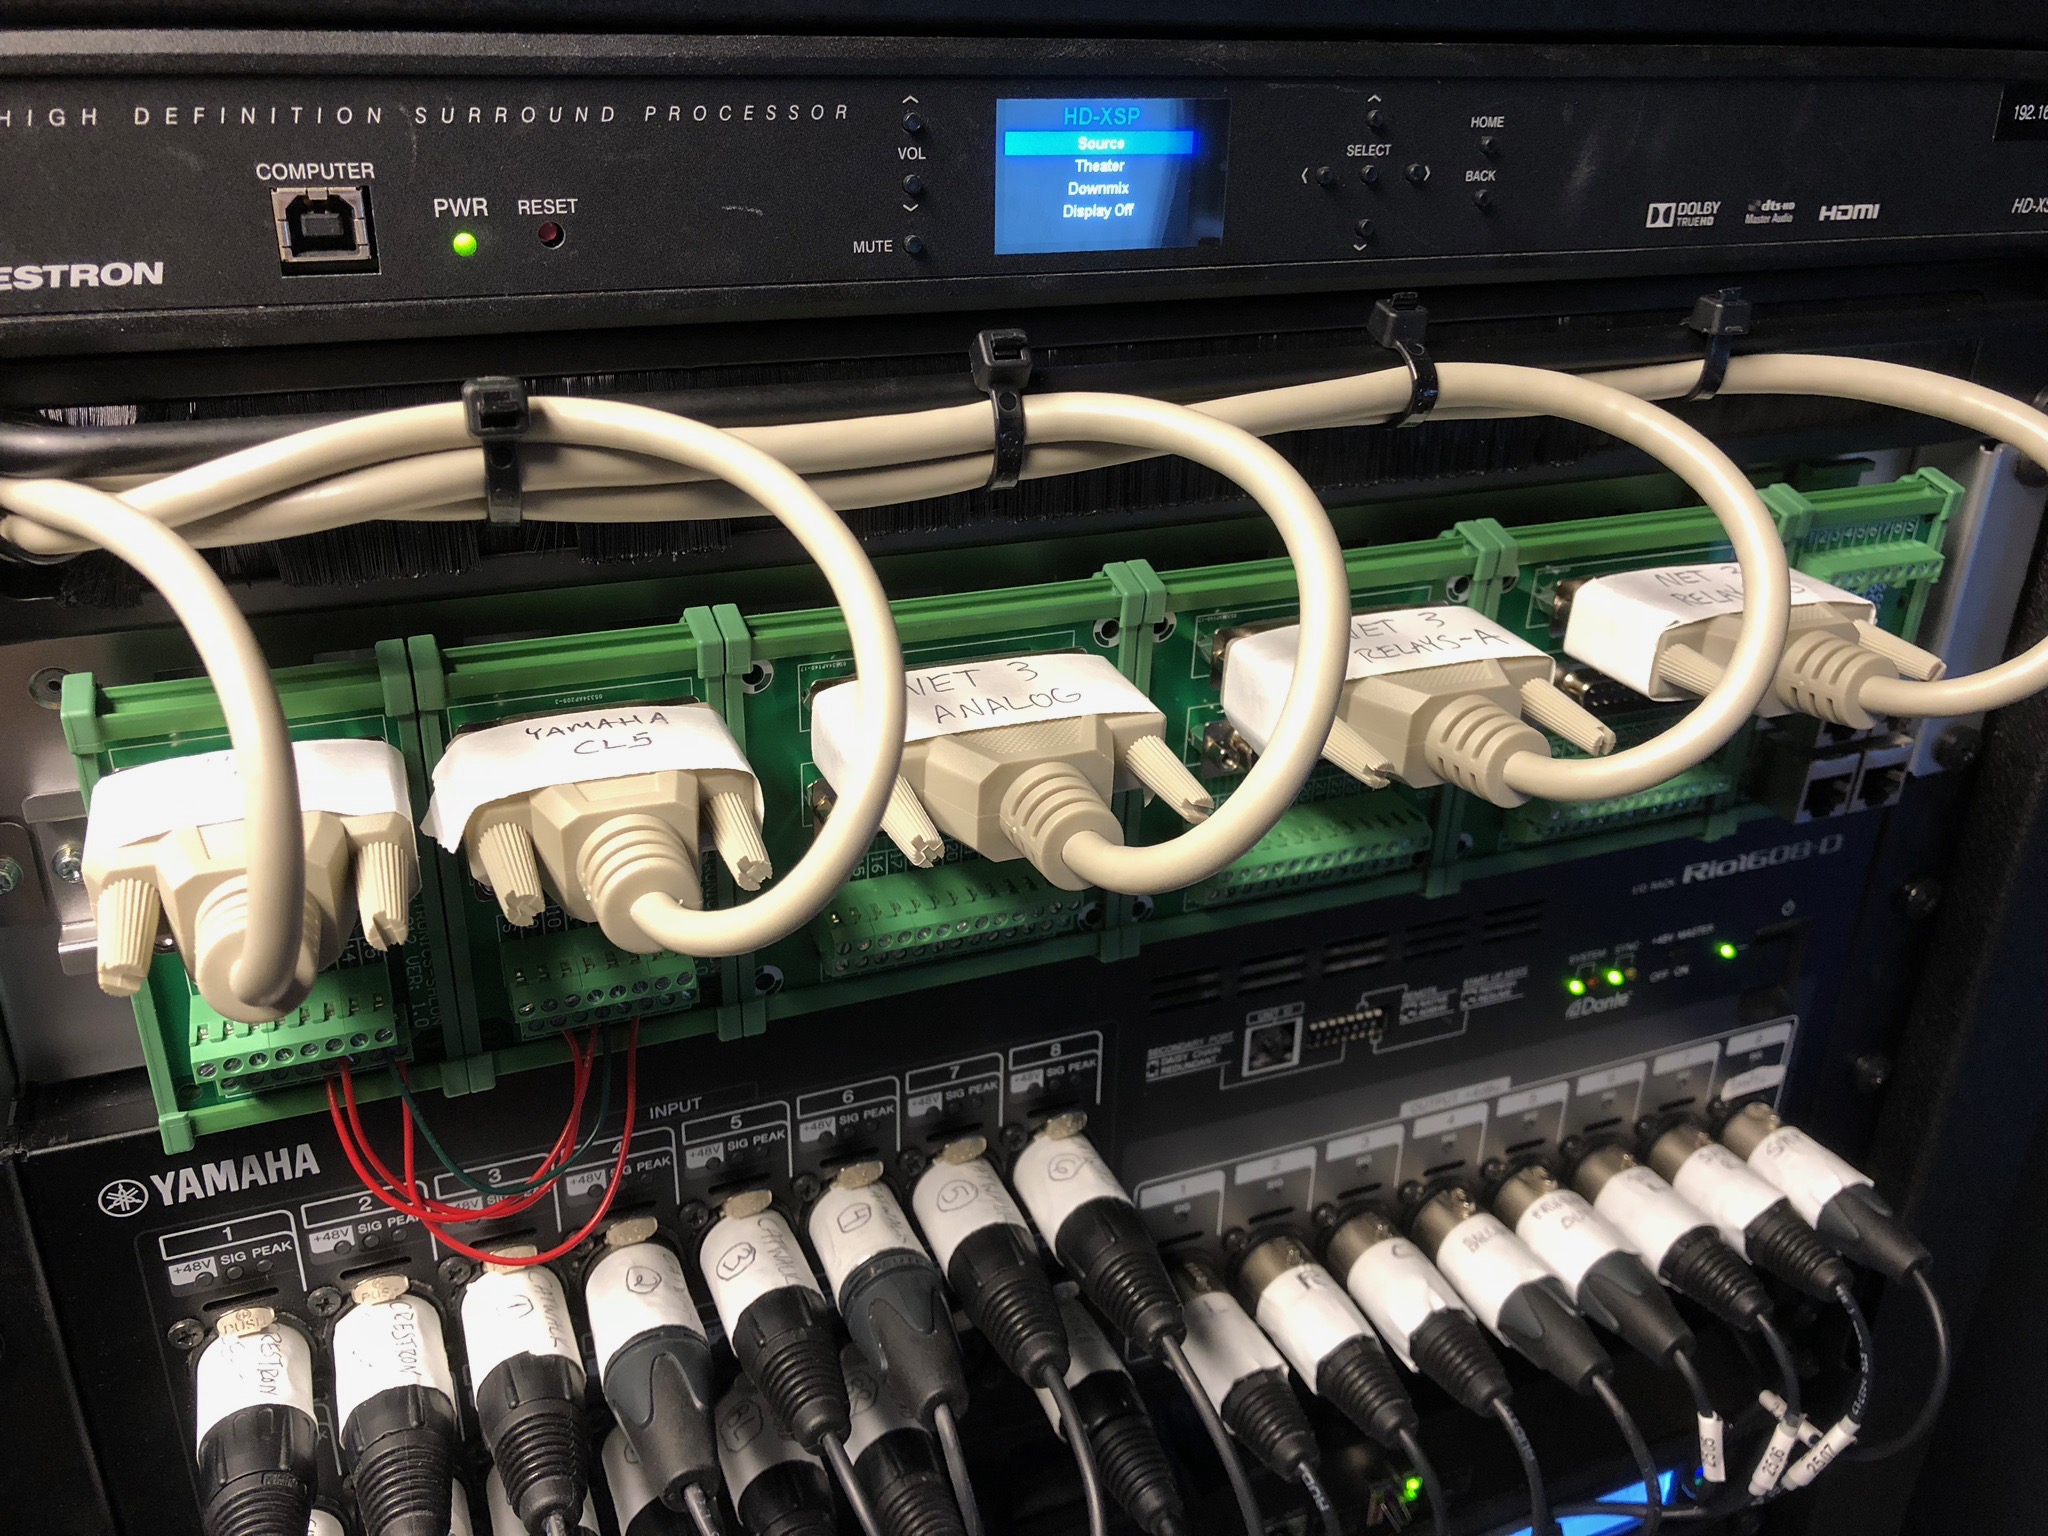
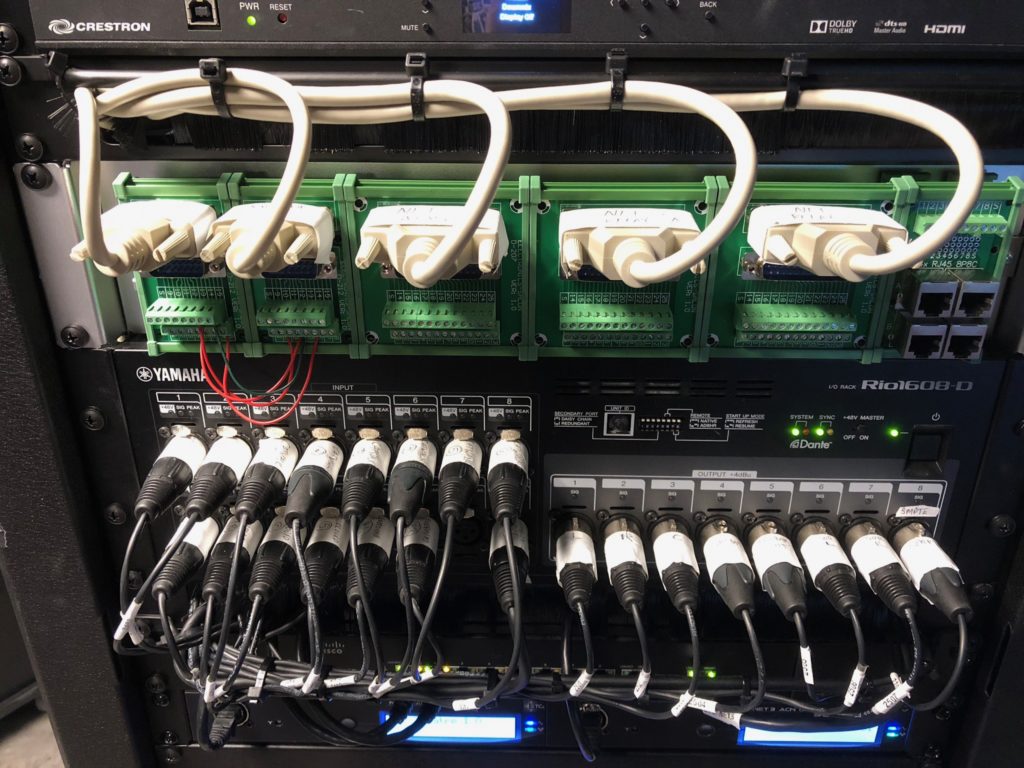
I stumbled across DIN rail mounted versions of all of the various connectors, as well as a 19″ rackmount DIN rail all available on Amazon Prime: (Note, if the links to these products don’t appear below, please disable your AdBlocker)
RACKMOUNT DIN RAIL SYSTEM
DB15 BREAKOUT
DB25 BREAKOUT
CAT5 BREAKOUT
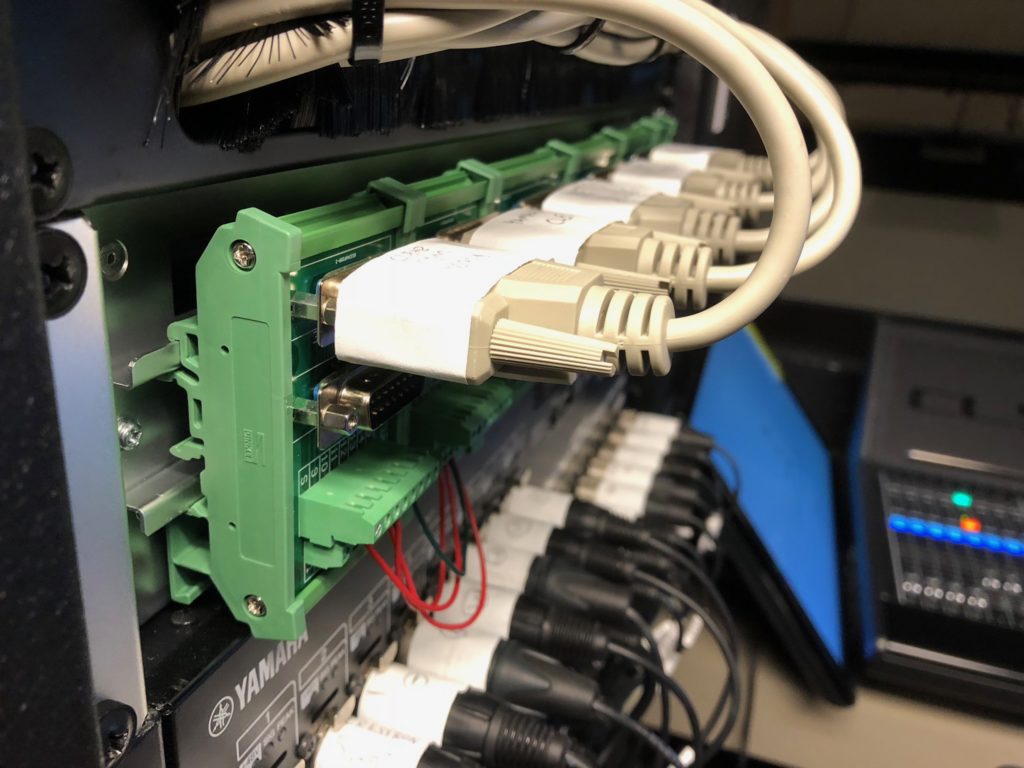
The breakouts allow me to use small wire jumpers to make connections between the various systems in one place
CONFIGURING THE SYSTEMS
CLEARCOM AND CL5
The first task was to integrate the announcement mic on the ClearCom MS704 Station into the Yamaha CL5 sound board.
The audio is carried from the “announce out” on the ClearCom station to a port on a RIO-1608 interface. The CL is then patched to have the talkback input mic on that channel. The channel itself isn’t routed to any outputs on the console by default. There are three user defined keys that turn on the talkback in different outputs – 1, the L/C/R cluster; 2, onstage monitor mix; 3, backstage program.
The ClearCom announce button triggers a relay on the accessory connector:
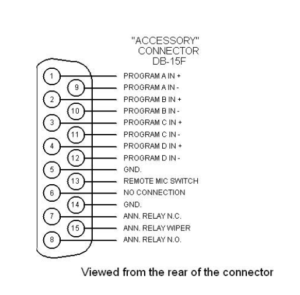
These pins are wired to the CL5 GPI DB15 connector.
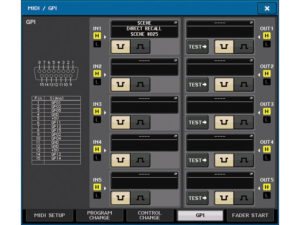
(Note – this is a stock image, not from my installation)
I also wired one of the outputs on the CL5 GPI to key the ClearCom mic on and off and then linked that to a user defined button. This makes it so you don’t have to take your hands and eyes off the console to talk into your com mic.
CL5 AND ETC NET3 GATEWAY
The Net3 I/O gateway is truly one of the best control products in the ETC lineup. 24 analog/contact inputs, 16 relays, and serial control all in one location, distributed over the lighting network.
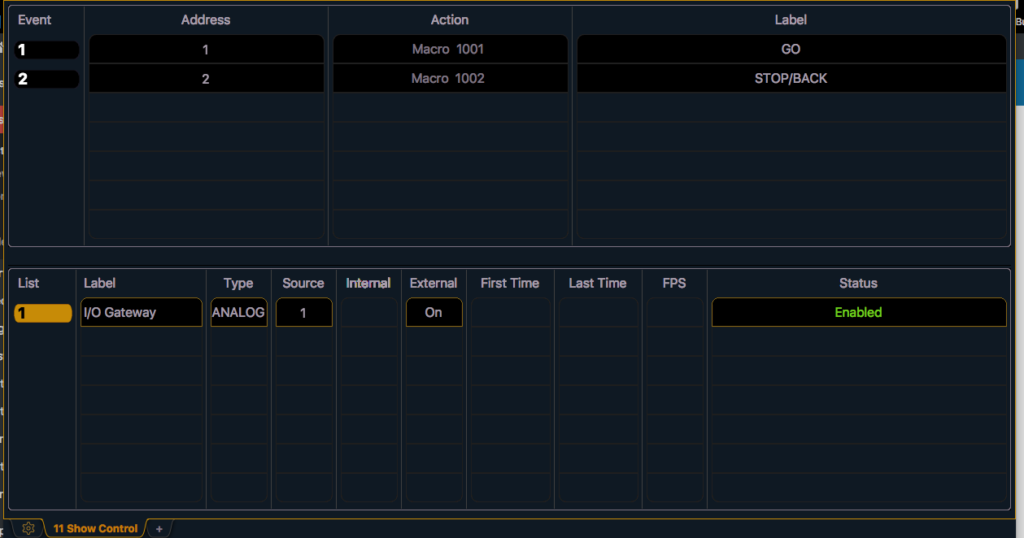
I wired the GPI of the CL5 to the first two analog inputs of the Net3 gateway and then linked them to two user defined keys on the CL5 – one for “go” and one for “back.”
Then, within the EOS software, I set up show control events for these contacts to trigger go and stop/back macros.
CRESTRON AND ETC NET3 GATEWAY
The Crestron DMPS300 had two available relay ports, so I had the programmer give me two buttons on the Crestron iPad app to trigger these on and off. These are then wired into analog ports 3 and 4 on the I/O gateway to trigger whatever I want them to.
I also was able to wire the projector screen into a relay port on the I/O gateway to allow me to drop the screen from the lighting console.
CAT5 BREAKOUT BOARD
The Cat5 breakout board allows connections to the system via cat5 cable. This allows me to run a single cat5 cable from FOH to the stage to allow for up to 4 contact closure inputs. Could be a light switch, could be a button, could be anything!
The eventual plan is to add a 1-RU blank panel with 4 or 5 buttons on it which can trigger multiple events at once. You could press one button and the screen would come in, the house lights would fade, the sound board would trigger a scene, the crestron would switch the projector on, switch to the AppleTV input, and you’d be all set!
How do you use analog inputs on your shows?
mikewoodld